Contents
Overview
The lab uses PsychoPy to create and present behavioral experiments to study participants. This is freely available, popular software built on Python. The resulting experiment (a .psyexp file) can be run standalone on a laptop or desktop for in-person data collection or via the Pavlovia.org website for online data collection.
Download and Setup
You can download the PsychoPy application here and install on your local computer. Give a gander to the Getting Started documentation. Full documentation is also available.
When creating a new .psyexp experiment, be sure to following the lab’s standard naming conventions.
Also set the nomenclature for the data output file with care so that it integrate seamlessly into data monitoring processes.
Creating an Experiment
There are numerous online resource for learning how to build an experiment. In addition, all experiments previously used by NDCLab are available on either GitHub or GitLab. All PsychoPy experiments should first be created on a local machine and thoroughly tested. For in-person studies, the experiment will be run on an experimental computer and should therefore be loaded and tested on that computer, as well. For online studies, the experiment will be hosted on Pavlovia (see below), where additional testing will be required.
Voice Files
If you need to run any text-to-speech for task instructions, use the “US English/Joana” voice available here.
JavaScript Output for Pavlovia
In order to run a PsychoPy experiment on Pavlovia, the .psyexp must be transformed into a .js file. This function is built into PsychoPy itself.
- Open the .psyexp file with PsychoPy on your local computer.
- Under the File menu, select “Export HTML…”. This outputs three files into the same folder as the .psyexp file:
- “index.html”
- a .js file with the same name as your .psyexp file
- a .js file that indicates “legacy-browsers”
Pavlovia
Accessing Pavlovia
Ask the lab manager for the Pavlovia credentials to use for your study. Do not set up your own account.
Uploading to Pavlovia/GitLab
There are two ways to upload an experiment to Pavlovia: via the built-in PsychoPy sync or with a manual commit to GitLab. Select the method with which you are most comfortable.
Manual Commit to GitLab
In order to do a manual commit to GitLab, you will need to set up a personal GitLab account and set up SSH authentication for your computer. Note that Pavlovia is hosting an independent GitLab, meaning that you need to sign up at gitlab.pavlovia.org/, not standalone GitLab. Then you can set up SSH authentication (from gitlab.pavlovia.org not gitlab.com) for your computer. (If you are comfortable using GitHub desktop client to work with Git, you can use it with GitLab, too. To do this, please see this link. But you can also just use your shell like you do with GitHub.)
| Instruction | Screenshot |
|---|---|
| 1. Log in to Pavlovia with your assigned lab account. From the Experiments list, click on any experiment. On the new page that loads, click “View code”: | 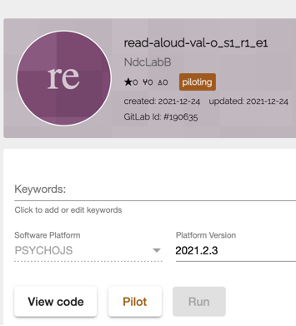 |
| 2. This opens the experiment in the associated GitLab account. Click the “+” at the top of the screen and select “New project” under the GitLab header: | 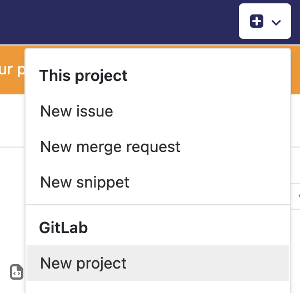 |
| 3. Input the “Project name” and “Project slug,” both of which should be identical to the name of your .psyexp file. Leave the “Visibility Level” as “Private.” Click “Create project:” | 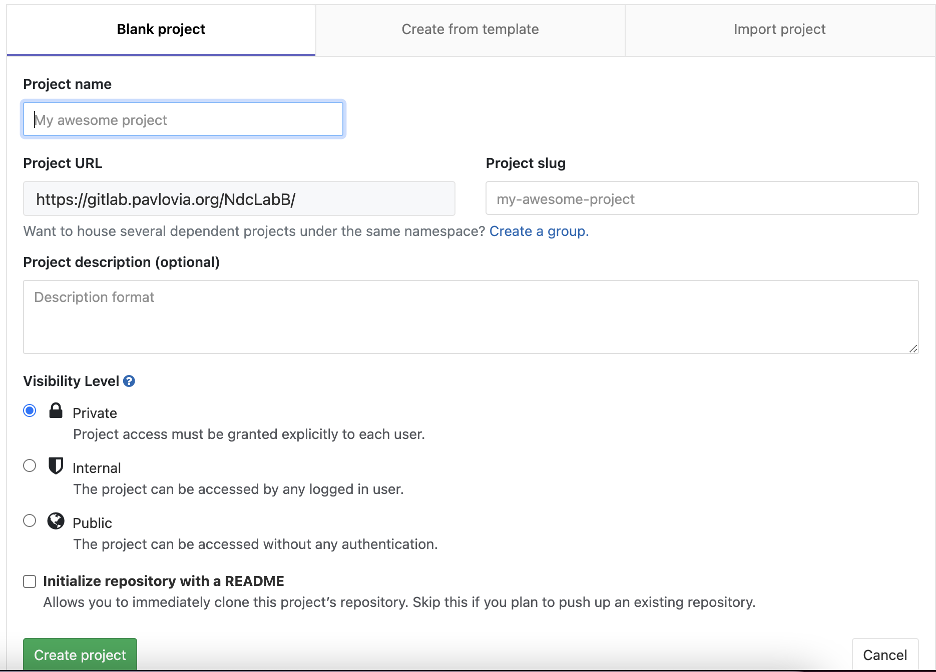 |
| 4. This has created an empty repository for you on GitLab. Since the created repository is private by default, you must grant permission to your personal GitLab account to access the repository. On the left GitLab toolbar, hover over “Settings” and click “Members:” |  |
| 5. Type your personal GitLab account username under “Select members to invite.” For “Choose a role permission”, select “Maintainer.” Leave the “Access expiration date” blank. Click “Add to project” to grant access to your personal account: | 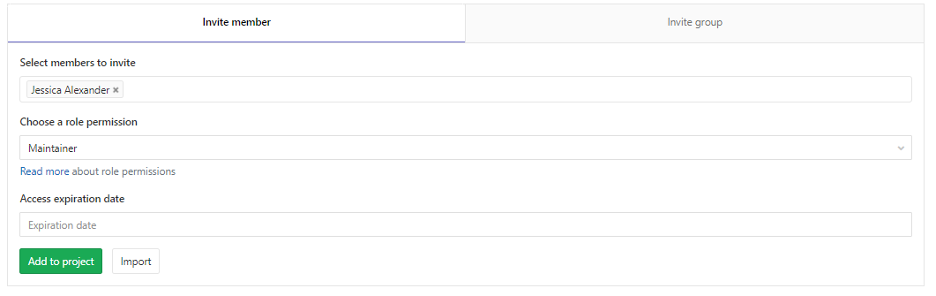 |
You can now use standard Git commands to clone this repository to your local machine, which is authenticated via your personal Pavlovia GitLab user name. Drag and drop all contents of your PsychoPy experiment (that is, the .psyexp file, the two .js files, the .html file, and the full resources folder) into the cloned repository. It is also recommended that you drag over the “data” folder, but empty all of its contents before you commit the changes to GitLab (since these would all be outputs of testing and there is no need to track them on GitLab). Once all your experimental files are happily in the git-initialized folder you just created, use standard Git commands to add these changes to your staging area, commit them, and push them to the GitLab remote (git push origin master).
Log in to Pavlovia through your browser using the lab account. Click on “Dashboard,” then “Experiments.” If your experiment was uploaded properly, you will see it in the list of all experiments in this lab account.
PsychoPy Sync
- Open the .psyexp in PsychoPy. You should already have exported the .js/.html files as described above.
- Click on the “Log in to Pavlovia.org” icon (see below) and log in to your study’s Pavlovia account.
- Return to the PsychoPy Builder window, then click on the “Sync with web project” icon (see below) to sync with Pavlovia. Be aware that it might take some time to respond.
- A new window will appear; select the option to “(Re)create project” and click “Ok”.
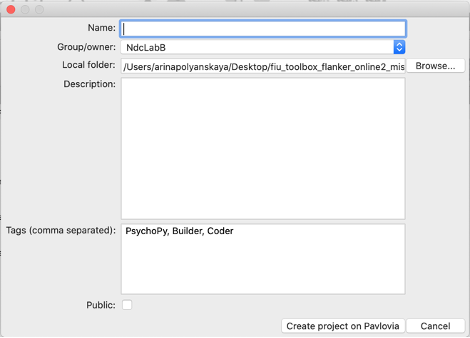
- On the next window, input the experiment name (identical to the name of the .psyexp) in the “Name” field. Confirm that the “Group/owner” is showing the correct lab account name. Leave the “Public” checkbox unchecked. Click on “Create project on Pavlovia.” Another window will pop up asking to confirm the changes you are making; click “Ok.” It may take some time for the experiment to sync with Pavlovia.
| Icon | Description |
|---|---|
| Log in to Pavlovia.org | |
| Sync with web project |
Log in to Pavlovia through your browser. Click on “Dashboard,” then “Experiments.” If your experiment was uploaded properly, you will see it in the list of all experiments run using this lab account.
Click “View code” to view the associated GitLab repository and ensure that the repository is set to “private.”
Updating GitHub
When a PsychoPy experiment is hosted on Pavlovia/GitLab, we do not need to keep a separate copy of it on GitHub. (Having two versions can create discrepancies over time.) Instead, use the readme file in the materials/ folder on GitHub to link to GitLab.
While the GitLab repository is set to “private” during data collection, the GitHub readme can say something like:
The PsychoPy script is currently running on Pavlovia. If you would like to see or fork it, please contact us. Once data collection has ended, this page will include an open access link to the GitLab repository for the .psyexp experiment and its associated resources.
Once data collection is complete, notify the lab manager so they can clear all data history on GitLab and make the repo public. After this is complete, you can update the readme on your GitHub repository to link directly to the GitLab repository where the .psyexp and resource files permanently live.
Piloting on Pavlovia
Piloting an online experiment allows you to test it online without consuming any Pavlovia credits. When you run a pilot test, the PsychoPy .csv output will download directly to your local machine (rather than saving automatically to the “data” folder).
To begin piloting, change the status of the experiment from “Inactive” to “Piloting” on the Pavlovia Experiments page:
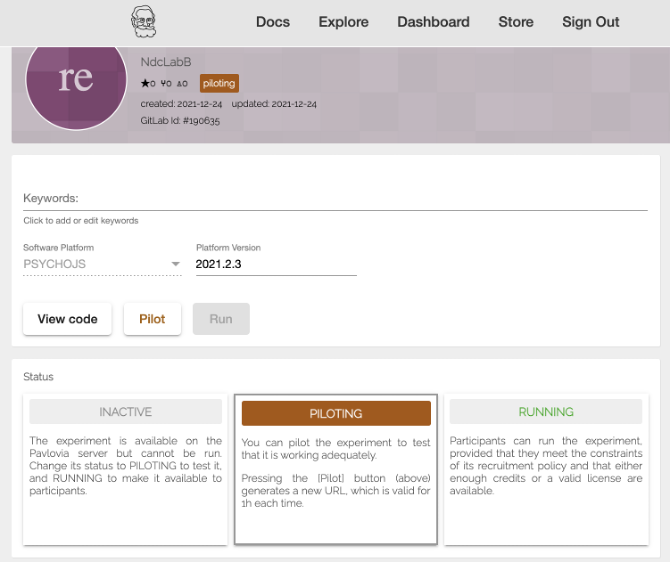
Pilot yourself first by clicking the “Pilot” button, which opens your experiment in a new browser tab.
Separately, you will also need to pilot the REDCap project and how that connects to Pavlovia. This is a little tricky. First, grab the piloting link by clicking the “Pilot” button and copying the path that opens in the address bar. It will look something like this:
run.pavlovia.org/NdcLabB/read-aloud-val-o_S1_r1_e1/?__pilotToken=6f4922blahblah&__oauthToken=15988e625blahblah
Immediately close the browser tab so that it doesn’t count you as the one-time pilot participant for that link. Over on REDCap, temporarily adjust the link inside your “link to Pavlovia” instrument to include these two variables, which will need to be unique for each person who tests for you and which are only valid for one hour:
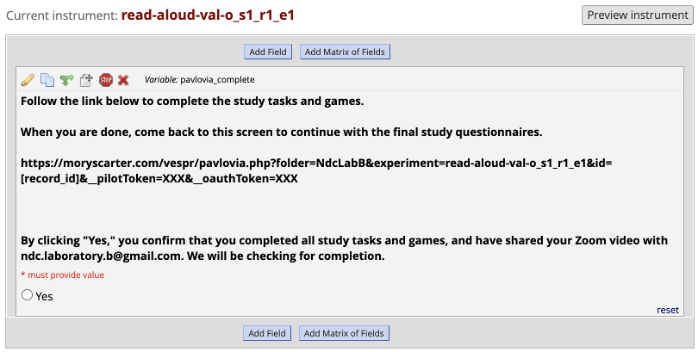
Don’t forget to switch this back before you start real data collection (or else your participants will not be able to access the Pavlovia experiment at all!).
Activating an Experiment
To begin collecting data, the experiment needs to be in “Running” mode.
- On the Pavlovia Dashboard, select the Experiment that you want to activate.
- On the experiment page, select the “Running” button to activate the study. Make sure to assign credits (see below).
Managing Credits
To begin data collection, contact the lab manager to add credits to the Pavlovia account that your study is using. Be sure to have the PI’s approval for the number of credits you intend to run because each credit costs the lab money. Provide the lab manager with precise information on the number of credits needed.
After credits have been added to the Pavlovia account, assign them to your Experiment:
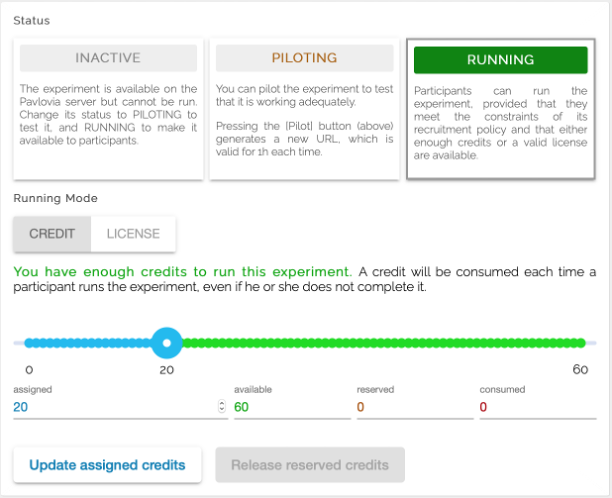
As participants complete the study, monitor how many credits are remaining and contact the PI/lab manager to discuss a refill when you are <20 credits remaining.