Contents
- Overview
- Sourcedata Structure
- Central Tracker
- Setting Up
- hallMonitor.sub
- preprocess.sub
- Protocol
- Final Considerations
Overview
Data monitoring is an ongoing process during data collection and preprocessing. This process has three key goals:
- Regularly check that data is in good order (e.g., proper organization and correct file naming).
- Regularly check on data quality (e.g., preprocessed data points are not wildly different than expections, implying an error in the study experiment).
- Maintain an up-to-date central tracker with all relevant data points per participant.
At this time, these steps are handled manually by study leads for data collection projects. The long-term goal of the NDCLab, however, is to automate these functions.
Sourcedata Structure
Within sourcedata/raw, folders should be organized as follows (and as appropriate for the data being collected; not all folders will be required for all projects):
/raw/
├── s1_r1/
├── redcap/
├── psychopy/
├──sub-XXXXXX/
├──sub-XXXXXX/
├── audio/
├──sub-XXXXXX/
├──sub-XXXXXX/
├── video/
├──sub-XXXXXX/
├──sub-XXXXXX/
├── eeg/
├──sub-XXXXXX/
├──sub-XXXXXX/
├── digi/
├──sub-XXXXXX/
├──sub-XXXXXX/
…and the same for raw/s2_r1, etc. Note that “audio” and “video” may be replaced with “audacity” and “zoom”, respectively.
Central Tracker
Each data collection project has a central tracker that provides a real-time overview of what data is available for each participant.
Data Dictionary
The rows and columns of the central tracker will be built directly from the contents of the central-tracker_datadict.csv file that you create. The sample template includes instructions within [brackets] and text to edit within {curly brackets}. Consult the readme.md file in data-monitoring/data-dictionary/ for details on how to build the data dictionary.
Required Variables
The first column in every NDCLab central tracker is called “id” and it specifies the participant ID.
- The “allowedValues” section of the “id” row in the data dictionary should specify the IDs that are allowed for that given study, stated in integer notation with integer sets separated by commas (for example, a study with 5-digit IDs that start with the number 4 would state the allowedValues as “[40000,49999]”; a study with 7-digit IDs that either start with 200 or 201 would state the allowedValues as “[2000000,2009999],[2010000,2019999]”)
- The setup script for data monitoring will populate the central tracker with IDs based on the ID variable found in a particular REDCap file. This is specified in the “provenance” section of the “id” row in the data dictionary (for example, the provenance could read “file: “thriveconsent”; variable: “record_id”” where the file and variable name are specified within double quotation marks). The only IDs that will populate in the central tracker are the IDs that exist in that REDCap file as the ID variable.
The second column in every NDCLab central tracker is called “consent” and it specifies whether the adult participant consented or not.
- The value of the consent column is based on the value of the “consent_complete” (or “consentes_complete”) variable within REDCap data. Note that the consent instrument in REDCap must be named “consent” (or “consentes”) in order for the “_complete” variable to be named properly.
If a study population includes participants under the age of 18, the third column in the central tracker will be called “assent” and it will specify whether the child participant assented or not.
- The value of the assent column is based on the value of the “assent_complete” variable within REDCap data. Note that the assent instrument in REDCap must be named “assent” in order for the “_complete” variable to be named properly.
Next, the central tracker will have columns related to non-questionnaire data (e.g., psychopy, audio/audacity, video/zoom, eeg, digi).
- Each task within a given data type will have a column in the central tracker (based on the rows in the data dictionary for each task and data type intersection), and the columns will be named based on the variable name listed in the data dictionary with the appropriate suffix appended. The variable name in the data dictionary for non-questionnaire data should follow the convention of “
task_dataType” wheretaskis the name of the task anddataTypeis the type of data collected during that task. - Note: for instances in which a given data type’s collection is not separated according to tasks (e.g., “
flanker_eeg” or “social-interaction_eeg”) but rather is collected across all tasks, the task name will be “all” (e.g., “all_eeg”). - For instances in which we want to combine multiple columns into a single column for viewing purposes (for example, if we have data for multiple versions of a single Pyschopy task) the dataType is “combination” and the desired columns to aggregate are noted in “provenance”
For questionnaire data from REDCap, there will be one row in the data dictionary for each individual questionnaire, with the variable for that row named exactly as the questionnaire is. Thus, there will be one column in the central tracker for each questionnaire, named exactly as the questionnaire is, with the appropriate suffix appended. If there is a questionnaire that is duplicated across REDCap projects within the same study (i.e., the same exact survey is answered twice by two different reporters), there needs to be an an identifier string of text appended to the survey name in the variable column in the data dictionary that identifies which reporter answered the survey. The reporter string should match the reporter information that’s included in the title of the REDCap project that includes that specific survey.
For scored data from REDCap questionnaires, there will be one row in the data dictionary for each individual subscore, with the variable for that row named exactly as the subscore is. Thus, there will be one column in the central tracker for each subscore, named exactly as the subscore is, with the appropriate suffix appended.
If a study population includes primary and secondary parents, there will be a row in the data dictionary for parent identity status, with the variable name “pidentity” and the dataType “parent_identity”. Thus, there will be columns in the central tracker for parent identity status with the appropriate suffix appended. If parent identity status needs to be tracked across multiple REDCap projects, there can be multiple parent identity rows in the data dictionary, with each variable name modified slightly to correspond to the appropriate REDCap project (i.e., “pidentityiqs” and “pidentitybbs”). See the example data dictionary in the template dataset on GitHub for further guidance.
If a study population includes parents who speak both English and Spanish, there will be a row in the data dictionary for parent language status, with the variable name “plang” and the dataType “parent_lang”. Thus, there will be columns in the central tracker for parent language status with the appropriate suffix appended. If parent language status needs to be tracked across multiple REDCap projects, there can be multiple parent language rows in the data dictionary, with each variable name modified slightly to correspond to the appropriate REDCap project (i.e., “plangiqs” and “plangbbs”). See the example data dictionary in the template dataset on GitHub for further guidance.
For custom variables, you will control these in your preprocessing scripts. In the data dictionary, be sure to specify how each is operating and include the name of the script in the provenance column.
File Name
Scripts in the data monitoring ecosystem access a study’s central tracker based on its filename. For this reason, the nomenclature is standardized: central-tracker_dataset-name. For example, the memory-for-error-dataset project has a central tracker named central-tracker_memory-for-error-dataset. You do not need to name this file yourself, but you do need to ensure that the data dictionary you create for your central tracker is named central-tracker_datadict.csv and that it lives in data-monitoring/data-dictionary/ within your dataset repository.
Setting Up
Once the central tracker data dictionary is prepared, the study lead can begin data monitoring by copying a set of scripts to the dataset.
From the HPC shell, navigate to the datasets folder:
cd /home/data/NDClab/datasets
You will input a single command to set up the central tracker and data monitoring within the dataset, and the datatypes and other relevant information will be read from the central tracker data dictionary.
bash /home/data/NDClab/tools/lab-devOps/scripts/monitor/setup.sh -t -c YOUR-DATASET
- -t FLAG: always include this flag so that a tracker is generated on the basis of your central tracker data dictionary, unless you have a preciously generated tracker.
- -c FLAG: this flag indicates that the REDCap files include both child data and parent data. The parent IDs in the REDCap files, ending in 8XXXX (primary parent) or 9XXXX (secondary parent) will map to the child’s ID ending in 0XXXX in the central tracker.
- YOUR-DATASET: this is the name of your dataset
Here is an example of the setup line for thrive-dataset.
bash /home/data/NDClab/tools/lab-devOps/scripts/monitor/setup.sh -t -c thrive-dataset
After executing this command, the following new files (in addition to the blank central tracker) will be added to your dataset’s data-monitoring folder:
- hallMonitor.sh
- hallMonitor.sub
- preprocess.sub
- preprocess_wrapper.sub
- rename-cols.py
- check-id.py
- update-tracker.py
- verify-copy.py
- check-datadict.py
- data-monitoring-log.md
- check_existence_datatype_folders.py
- subjects_yet_to_process.py
- update-tracker-postMADE.py
setup.sh should be re-run any time the data dictionary is modified so that the central tracker stays up to date. hallMonitor will give a warning when it sees that the data dictionary used in setup is not the most recent version.
Details for hallMonitor and preprocess are available below.
hallMonitor.sub
Purpose
The hallMonitor script (hallMonitor.sh) is triggered by running the associated slurm file (hallMonitor.sub) while in data-monitoring (cd your-dataset/data-monitoring and then sbatch hallMonitor.sub). It checks that raw data (sourcedata/raw) is in good order and, once confirmed, places a copy of the data in sourcedata/checked. Errors in the names and structure of the files in sourcedata/raw are noted in the slurm-XXXX.out and slurm-XXXX_errorlog.out files. This serves two key purposes:
- issues with the incoming data (e.g., improper file naming) are identified and corrected early.
- downstream processes (like updating the central tracker) interact with the “checked” data and safeguard the integrity of the original “raw” data.
Specifically, hallMonitor performs the following checks:
REDCap
- Identifies most recent uniquely named REDCap CSVs.
- Copies these files to
sourcedata/checked/redcap. - Updates all relevant rows in the central tracker by means of update-tracker.py.
Nonencrypted Data (Pavlovia/Psychopy, EEG, others)
- Checks for the existence of new files in
sourcedata/raw/sX_rX/DATATYPEand, if they are found, verifies the files are named correctly. Filenames follow the conventionsub-<NUMBER>_<task>_<dataType>_<suffix>.<extension>, where NUMBER is the ID number, task is the name of the task (or “all” if data is collected across all tasks), dataType is the type of data, suffix is the session, run, and event the data was collected in (e.g., “s1_r1_e1”), and extension is the file’s extension (e.g., “.csv”). - For correctly-named files, files are copied over to
sourcedata/checked/sub-XXXXXX/sX_rX/DATATYPE. - If any duplicate files or improper file or folder names are identified, hallMonitor outputs a red error message. This error message will be found in the slurm-XXXX.out and slurm-XXXX_errorlog.out files.
Encrypted Data (Audio/Video/Digi)
- Audio, video, and photo (such as EEG digitization, “digi”) files containing identifiable information are managed manually by the study lead. Proper encryption should be verified (that is, decryption using the study password should be tested and confirmed, see here), after which the participant’s audio/video/digi files should be manually copied to
sourcedata/checked. Filenames again follow the conventionsub-<NUMBER>_<task>_<dataType>_<suffix>.<extension>. - The hallMonitor script simply verifies the existence and correct naming of the encyrpted (.gpg) files in
sourcedata/checkedand updates the audio/audacity, video/zoom, and/or digi columns of the central tracker accordingly (using update-tracker.py). - Incorrectly named files or folders are noted in an error message found in the slurm-XXXX.out and slurm-XXXX_errorlog.out files.
Checked Data Structure
Within sourcedata/checked, folders should be organized by subject, session, and datatype:
/checked/
├── redcap/
├── Redcap1_DATA_YYYY_MM_DD_HHMM.csv
├── Redcap2_DATA_YYYY_MM_DD_HHMM.csv
├── sub-XXXXXX/
├── s1_r1/
├── eeg/
├── digi/
├── audio/
├── video/
├── psychopy/
├── s2_r1/
├── eeg/
├── digi/
├── audio/
├── video/
├── psychopy/
├── sub-XXXXXX/
├── s1_r1/
├── eeg/
├── digi/
├── audio/
├── video/
├── psychopy/
├── s2_r1/
├── eeg/
├── digi/
├── audio/
├── video/
├── psychopy/
…and the same for /s3_r1/, etc. Note that “audio” and “video” may be replaced with “audacity” and “zoom”, respectively.
Customize
Most customization required for the hallMonitor script is handled by the central tracker data dictionary. However, if REDCap column names need to be re-mapped to match the expectations of the instruments script, this can be built directly into hallMonitor. There are two options available:
one-to-one mapping
If just the instrument name requires remapping, the -m flag allows you to specify this. Here is an example where the mistakenly named “sas” instrument is mapped to “sas2”: 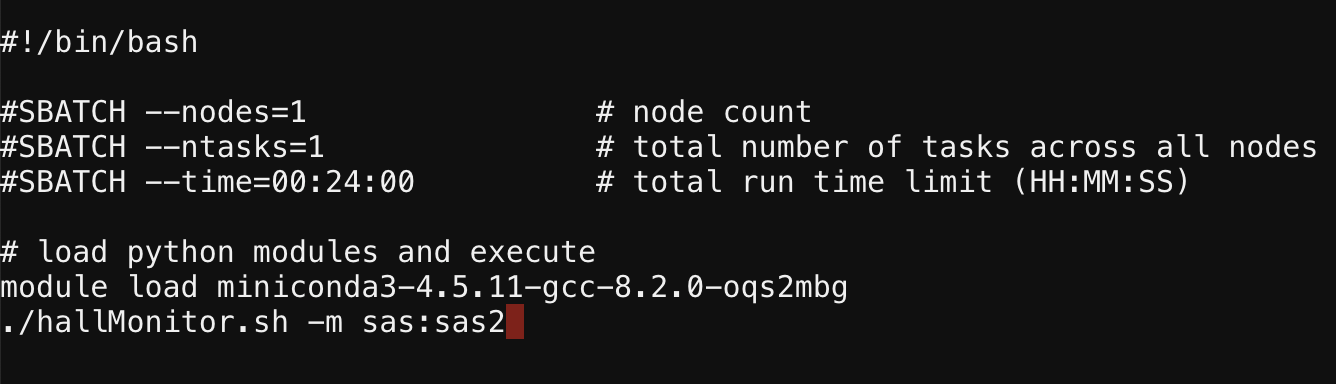
header replacement
If both the instrument name and the item numbers require remapping, you will use the -r flag to replace all column names. You will need to create a comma-separated list of the column names that should be used:
- Right-click the REDCap .csv file and open with a text editor.
- Copy the entire first line (careful: this first line may span visually over several lines in the text editor) except for “record_id” onto your clipboard.
- Insert into hallMonitor.sub following the instructions below.
To modify hallMonitor.sub:
- Navigate to the data-monitoring folder:
cd your-dataset/data-monitoring. - Open the .sub file:
nano hallMonitor.sub. - Arrow down to the line calling hallMonitor, add a space after
./hallMonitor.sh, then the flag (-mor-r) and the mapping or replacement details. - Save your changes by holding down the ctrl key and pressing the letter ‘o’. (Note: this is ctrl on both PC and Mac, not cmd.) You will be prompted to save the file, which you do by hitting enter/return.
- To exit the nano view, hold down the ctrl key again and press the letter ‘x’.
If you have added any modification to the REDCap header, this is executed (by running hallMonitor.sub) via the rename-cols.py script.
How to Run
The hallMonitor script should be run weekly by the project lead. It is recommended that you create a recurring reminder on your calendar or on Slack (/remind me on fridays 'run hallMonitor').
To run the script, ensure that you are on the main branch of the repository on the HPC. Use git pull to update the HPC with any changes available on the GitHub remote. Then follow the instructions here.
Review the error log output file for errors requiring correction (by using cat to print the messages to the console, i.e. cat slurm-NUMBER_errorlog.out). After making any necessary corrections, re-run the script until no errors are received, then remove all .out files to keep a tidy folder (rm slurm-NUMBER.out).
The hallMonitor script automatically updates the data-monitoring-log.md file in the dataset’s data-monitoring folder with a description of the job’s status and how many errors were encountered.
Once you have completed the hallMonitor process and everything is tidy, push your changes back to the GitHub remote (git add, git commit, git push). This merely updates the data monitoring scripts, log, and central tracker on GitHub; it does not transfer any data from sourcedata nor derivatives (those only live on the HPC).
preprocess.sub
Purpose
Pre-processing scripts transform the data collected from participants (questionnaires, behavioral tasks) into aggregate numbers that can be used for data analysis. These should draw upon data in the sourcedata/checked folder and output to derivatives/preprocessed. The preprocess slurm script is a handy shortcut that binds together the automated scoring of REDCap data (via the instruments script), the preprocessing of your EEG data, and any other custom scripts that you tell it to run. Raw EEG files should be preprocessed with the Maryland Analysis of Developmental EEG (MADE) pipeline, which is a preprocessing pipeline specially tailored for pediatric EEG data. This pipeline can take 6-10 hours to process one EEG file, and so the amount of walltime you need depends on how many subjects you need to process. You can ask for more walltime from the command line (i.e. sbatch --time=24:00:00 preprocess.sub) or you can use preprocess_wrapper.sh which helps with this. Outputs from preprocess.sub are saved in derivatives/preprocessed.
preprocess_wrapper.sh
In cases where you want to preprocess only certain subjects, or if you want to quickly score REDCap data without processing all your EEG files which can take many hours, the preprocess_wrapper.sh script can be useful. By default preprocess.sub requests just 30 minutes, and so if there are any unprocessed EEG files in sourcedata/checked you may need to use this wrapper script. See here for more info on using this.
Instruments
The preprocess slurm script calls the instruments scoring mechanism, which will identify the most recent REDCap file in sourcedata/checked/redcap, score it automatically, and output it to derivatives/preprocessed, having renamed the “DATA” in the original filename to “SCRD.” It also updates any columns in the central tracker that are built from rows in the data dictionary that have the dataType “redcap_scrd”.
R/MATLAB/Python Scripts
You need to create and test these scripts first on local and individually on the HPC before binding them into preprocess.sub. This is very important because if you accidentally create an infinite loop on the HPC, you could burn through all of the lab’s monthly time allottment on the HPC and you would be forced to do all your calculations by hand until the end of the month! ![]()
The wiki includes instructions for running standalone R, MATLAB, and Python scripts.
In addition to preprocessing your data, your R, MATLAB, or Python scripts must include the necessary code to update your study’s central tracker when they run. Here is an example in R that can be modified for your script. This example specifically updates the readAloudDisfluencies_s1_r1_e1 variable in the central tracker if the participant ID has been included in the “disfluencySummaryDat” dataframe:
#load central tracker
track_path <- '/home/data/NDClab/datasets/readAloud-valence-dataset/data-monitoring/central-tracker_readAloud-valence-dataset.csv'
trackerDat <- read.csv(track_path, header=TRUE, check.names=FALSE)

#readAloudDisfluencies_s1_r1_e1
for(row in 1:length(trackerDat$id)){
  id <- trackerDat[row, "id"]
  if (id %in% unique(disfluencySummaryDat$id)){
    trackerDat[trackerDat$id == id, ]$readAloudDisfluencies_s1_r1_e1 = "1"
  } else {
    trackerDat[trackerDat$id == id, ]$readAloudDisfluencies_s1_r1_e1 = "0"
  }
}
print("Updated readAloudDisfluencies_s1_r1_e1!")

#write back to central tracker
write.csv(trackerDat, track_path, row.names = FALSE)
Customize
You must specify the container(s) and script(s) that you want included in the preprocess slurm script. Use the same nano command as above to modify the preprocess.sub file contents. Here is an example: 
How to Run
Pre-processing scripts should be created as early as possible in the data collection process (ideally to process even the first participant!), and then should be run by the project lead on a weekly basis to ensure that the incoming data appears to be in good order (for instance, ensuring we are not seeing a trend of wild inaccuracy in simple computer tasks or strange numbers in questionnaire data).
To run the script, follow the instructions here.
The preprocess slurm script automatically updates the data-monitoring-log.md file in the dataset’s data-monitoring folder.
Once you have completed each run of preprocessing and everything is tidy, push your changes back to the GitHub remote (git add, git commit, git push). This merely updates the data monitoring scripts, log, and central tracker on GitHub; it does not transfer any data from sourcedata nor derivatives (those only live on the HPC).
Protocol
Although the broad strokes of data monitoring are identical across NDCLab studies, each data collection project should establish its own data monitoring protocol that connects these lab processes with study-specific details. Those study-specific details should be defined in the data collection project’s dataset folder. The general template for the lab’s data monitoring protocol is listed below.
Data Uploads to the HPC
In order to run data monitoring scripts, data must first be uploaded to the HPC. The general guidelines for who uploads which data types and when is defined as:
- REDCap data is uploaded to
sourcedata/raw/sX_rX/redcapby the study lead/coordinator twice a week (for ex: on Mondays and Thursdays). It is recommended that you create a recurring reminder on your calendar or on Slack (/remind me on mondays and thursdays 'upload REDCap data to HPC'). - All other data that is collected during a study visit (psychopy, eeg, digi, etc.) is uploaded by the RA(s) that conducted the visit as soon as the visit has concluded. Specific instructions regarding post-visit data backups are included in the project’s study protocol.
Decryption Checks
All encrypted data (audio, video, digi) that is uploaded to the HPC following a study visit must be checked for proper encryption within 3 days of upload. These decryption checks will be performed by assigned RAs or staff who did not upload the data to the HPC, to ensure that the study decryption password works to decrypt the files. After checking for proper encryption, the file must also be unzipped and opened in the appropriate application to ensure that it opens and plays properly (if applicable). If the file can be successfully decrypted, unzipped, and opened, the RA will manually move the checked audio, video, and digi files to sourcedata/checked. Finally, the RA must update the study’s decryption check log to indicate that the files passed the decryption check and were moved to sourcedata/checked.
Note that the default unzipping application on Macs has a maximum file size limit, above which it cannot unzip files. If you are attempting to unzip a file on Mac and get an error that the file cannot be unzipped, you will need to use another unzipping application. The Unarchiver is a free Mac application that works to unzip larger files than the default Mac application.
The study lead/coordinator should perform weekly reviews to ensure that all encrypted data in sourcedata/raw has been checked for proper encryption and manually moved to sourcedata/checked.
Running Data Monitoring
Data monitoring scripts (hallMonitor.sub and preprocess.sub) should be run once a week by the study lead/coordinator. It is recommended that you create a recurring reminder on your calendar or on Slack (/remind me on fridays 'run hallMonitor and preprocess').
After running hallMonitor, review the error log output file for errors requiring correction (by using cat to print the messages to the console, i.e. cat slurm-NUMBER_errorlog.out). You will need to make the necessary corrections so that errors are no longer received. Each time you make a change, you must make note of that change in the study’s data-monitoring-log tracker spreadsheet (which should be created by the study lead when data monitoring begins running). Please note the following two cases in which corrections must be made in multiple places:
- If the ID was enterred incorrectly for a psychopy file, the ID must be corrected both in the file’s name and in the .csv file’s ID column
- If a Brain Vision EEG file was named incorrectly, the name must be corrected in all EEG files’ names as well as in the DataFile and MarkerFile lines at the top of the .vhdr file
There are two cases in which an error cannot or should not be directly corrected, but a note should be logged in the participant’s folder to explain the lack of correction.
Case A: One or more file name(s) intentionally deviates from convention and does not require correction:
- Upon uploading data to the HPC following a study visit, the RA will make note of any data whose collection deviated from convention by uploading an “issue.txt” file to the participant’s folder which includes an explanation for the the files’ intentional deviations from naming convention. If this file is missing or lacking a proper explanation, contact the RA(s) who uploaded the data and ask them to resolve any issues.
- Ensure that the first portion of the file names leading up to the deviation matches file naming conventions (i.e.,
subject_task_dataType_session/run/event suffix) and that the deviation comes at the end of the name and is separated from the suffix by an underscore (for an example, see the “Intentional Deviations” section on the Naming Conventions page). - After ensuring the files in the folder are named properly, rename the “issue.txt” file to “deviation.txt”.
- Note: if the “deviation.txt” file is in an EEG folder, then the first line of the text file must specify which files in that folder should be processed by the EEG preprocessing pipeline. To do so, add a line to the top of the text file that states: “Files to process:
file-name.eeg,file-name.vmrk,file-name.vhdr”. However, if the EEG recording for a single task had to be split into two sets of files, then you should not add the “Files to process” line to the “deviation.txt” file, because the EEG preprocessing pipeline cannot process the participant’s EEG data in such a case.
- Note: if the “deviation.txt” file is in an EEG folder, then the first line of the text file must specify which files in that folder should be processed by the EEG preprocessing pipeline. To do so, add a line to the top of the text file that states: “Files to process:
- Manually copy both the files with the naming deviation and the “deviation.txt” file to
sourcedata/checked
Case B: Data was not collected for that participant:
- Upon uploading data to the HPC following a study visit, the RA will make note of any data that was not collected by uploading blank “issue.txt” text files to the participant’s folder.
- Rename the “issue.txt” file to “no-data.txt”, then edit the file to add the following line: “This participant’s data was not collected.”
- Manually copy the “no-data.txt” file to
sourcedata/checked
After making any necessary corrections, re-run the script until no errors are received. Ensure that sourcedata/checked and the central tracker have been updated to reflect the resolved errors, then remove all .out files to keep a tidy folder (rm slurm-NUMBER.out or rm slurm-*.out to delete them all).
Final Considerations
- If you switch to a new REDCap project during data collection (for instance, because you added a new instrument or corrected an old one), be sure to check any header mapping/replacements you added to
hallMonitor.subas these may need to be modified or deleted. - When data collection is complete, you should comment out the lines in
preprocess.subthat are no longer needed (for example, the lines that trigger the instruments script) so that you don’t create unnecessary duplicates.